Showing posts with label tutorial. Show all posts

Thursday, June 18, 2015

Cupcake Piñata


I'm getting ready for this years Createfest at the farm and I have been making a lot of sample crafts. One of the week long projects I am having the kids do is make a cupcake piñata. I looked at a bunch of tutorials and found this one most helpful. I changed a few things that I found easier, and I decided to post a tutorial on how to make a cupcake piñata, so here it goes:

suplies-
paper mache mixture (one part flour, two parts water)
duct tape
plastic trash can
plastic bowl (i found a planter holder at the dollar store)
brown paper
colored tissue paper
piñata fillings
thick yarn or jute for hanging (my plant holder already had a holding string attached)
2" strips of news paper
tacky glue
brown paint (optional)


Step 1:
 paper mache the separate parts of the cupcake


the plant holder on the left is what I used for the top of the cup cake, it was super convenient because it had strings already attached that I could use for the hanging of the piñata - and the trash can for the bottom.


I did two layers of paper mache on each part.


Step 2: Fill the bucket/trash can with piñata goodies


I just filled it with candy I had around the house since its just a sample.


Step 3: Attach the cupcake together

I used duct tape to make sure it was super sturdy.
4. Paper Mache the attached cupcake

I did 2 layers of paper mache 
5. Paint the bottom of your cupcake (optional)


I decided to paint mine because I didn't want the newspaper to show when hanging
Step 6: Decorate your cupcake


I fanned brown paper for the cupcake wrapper and just attached it with duct tape.

I used tacky glue to attached tissue paper to look like frosting.

I cut little sprinkles our of tissue paper, and made a red ball to look like a cherry. I attached all this with tack glue.  This is my finished piñata.


I hope you find this tutorial helpful, and wish me luck having the kids make it next week at camp!


xoxo
Becky Jane


Tuesday, May 19, 2015

Ginger Rogers Piñata Tutorial

For my Dad's 60th birthday my family and I went all out. We threw him a surprise Ginger Rogers themed party. I made a piñata of her, and it was quite the process. I decided to make a tutorial of how I made her for you guys to check out!
Supplies:
cardboard/thick paper scraps
cereal boxes
balloons
paper mache mixture (1 part flour, two parts water)
crepe paper
paint
cotton balls
candy/filling
tape (masking and duct)
news paper
2" ruler
mod podge
sciccors
exacto knife (optional)
heavy duty string

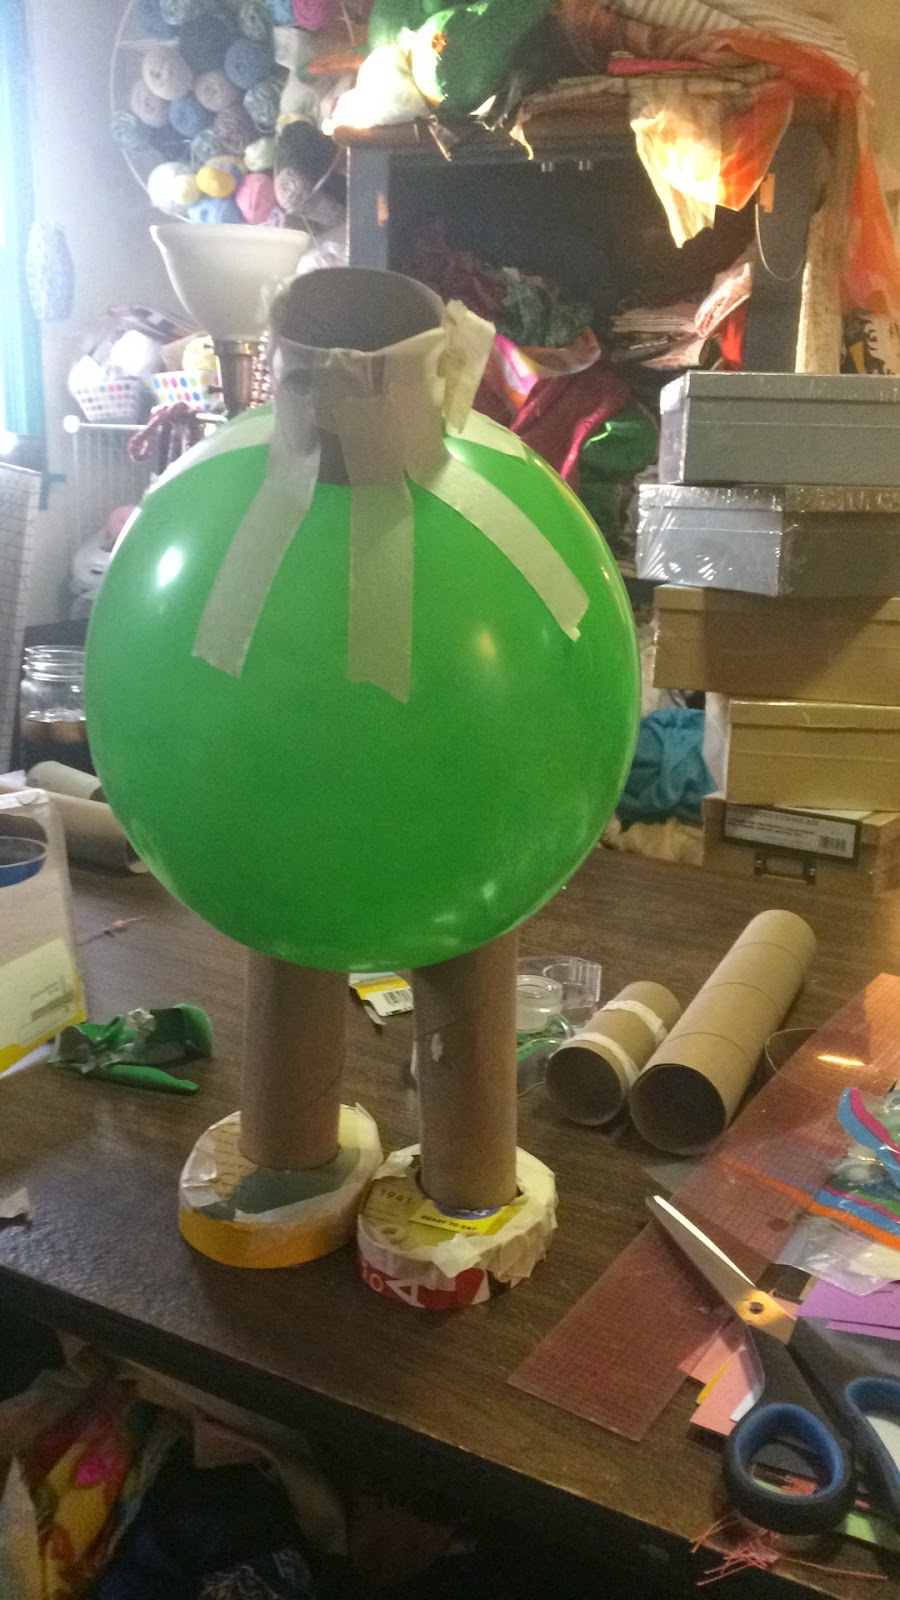
The base of Ginger is made with balloons, toilet paper rolls, and a cereal box for the feet. 
I made holes in a cheerio box to fit the toilet paper roll and then added a base to make it sturdier. 
                                         

I shortened a toilet paper roll for the neck to connect the body to the head. 


Then taped some arms on. 

Then I covered the shape with strips of news paper (I cut mine in two inch strips) dipped in my paper mache mix. 

This is a photo of the newspaper dry.  I did three layers of paper mache. 

I then covered her body with a nude crepe paper and mod podge. 
I decided to give her some boobs to give her more shape and not look so round. I taped cotton balls on, they ended up giving her a Madonna look haha. 

I decided to fill her before I started decorating her too much. So I cut a hole in the body and the head. 

I filled her with some of my dad's favorites, which include Little Debbies :)

I then started working on her dress. I used crepe paper and mod podge.

I taped a folder on to make her dress go out. 

This is a photo from the back while I was working on fringing the skirt of her dress.  I used the opening in the back and poked a hole in her head to attach the string for her to hang on. I reinforced that hole with many layers of duct tape so it would be strong enough to hold her. 

I dyed some cotton balls for her hair. I used a water based paint, but this took forever to dry,  I even had to pull out a hair dryer at one point, so I would recommend a light spray paint, or just buying colored pom-poms. 

I then started working on her face. I also used crepe paper and some paint. 

Side of Gingers head.

All Done!


This is what I was going for haha. She kind of ended up looking more like a muppet!

But my Dad loved her, and that's all that matters.


Piñatas are time consuming but so much fun. I really enjoyed making this one of Ginger Rogers.  I have a few more coming up for my kids camp this summer so stay tuned!

xoxo
Becky Jane

Tuesday, May 5, 2015

Tulle Skirt Tutorial

My sister Molly and some of her friends wanted to make tulle skirts for Mother's Day. So I decided to host a work-shop in my studio to help them make their skirts. I made a sample before the work shop, so here is my tutorial on how to make a tulle skirt!

Supply List:
5 yards of tulle
(I used more of a thin lace rather then tulle because I liked the weight better, but it has the same effect)
2 yards of lining
(I always buy more then enough fabric, just to be safe, this list you should definitely be safe)
pins
scissors
sewing machine
matching thread
1 yard elastic
( I did 1 1/2" , I didn't want my waist band to be super thick)
measuring tape
tailors chalk

I found this website helpful with tips on working with tulle.

Let's Begin:

1. First you want to cut rectangles of your layers of tulle. My skirt is three layers, so I cut 108" width by 25" length (the length is how long you want your skirt, I'm 5' 4" and my skirt hits just below the knee)

I cut my layers of tulle on a fold, and marked 54" on my cutting table. I found that an easy way to work with such a big piece of tulle. 


I then marked my 25" length on my cutting table. And cut all three layers of tulle.
 2. Put your tulle pieces aside for now, and cut your lining. Measure your widest part over your hips and add 10". My largest part was 35"- so I cut 45" by 25" for my lining. (length same as my tulle)
For some reason my lining still ended up a lot shorter then my tulle, I think the tulle stretched after I cut it, so you might want to add extra length on your lining if you don't like the look of it being shorter. In my case I thought it was cute and added depth to the piece. It's up to you :)


This is a picture of the lining measured out.
 3. Now sew all the side seams up on both the tulle and lining. (4 pieces) I sewed mine on 1/2" seam allowance, but 5/8" should be fine too. There is a lot extra fabric, so whatever you fancy.
side seams sewn!
4. Now pin all three layers of tulle together at the waist and baste stitch them together to treat as one piece. This part can be a little frustrating, but once you have this step done everything else is a piece of cake.  (make sure all your layers of tulle are pined together with seams facing the same way)
all my layers  pinned....

All my layers of  basted together.

5. Now pin and pleat your tulle layers onto your lining to fit your lining width.


All layers pinned together.
 6. Now baste stitch your lining to your tulle layers.


all layers basted together.
7. It is now time to cut your elastic. Measure your elastic around your natural waist ( 1/2"-1"above your belly button)  and cut it where if feels comfortable but snug.
 Then sew it together to make a circle, I again used a 1/2" seam allowance.

my elastic sewn together.
8. Sew down the seam allowance.

seam allowance sewn down. my seam is so crooked haha.
 9. Now mark with chalk your elastic in four places- front, back and side seams. They should be equal distances apart. (essentially just divide your elastic in 4 and mark with chalk)

 10. Pin your elastic to tulle/lining in those four places. Right sides together. (side seams, center front, and center back)


elastic pinned at four places. 
11. Now sew your elastic to your skirt.  You will have to pull your elastic while sewing since it will be smaller then your skirt. I sewed with a zig zag stitch.

12. Hem your lining. You don't need to hem your tulle layers.

13. All done!!! Enjoy your tulle skirt.


This is a picture of my finished skirt. When I cut my tulle layers I had my top layer end on the selvage so that it would give   a finished look. 


This was a fun and easy project! Stay tuned for pictures from the work shop and the skirts they chose to make!

xoxo
Becky Jane